
DIY Dent or Body Shop
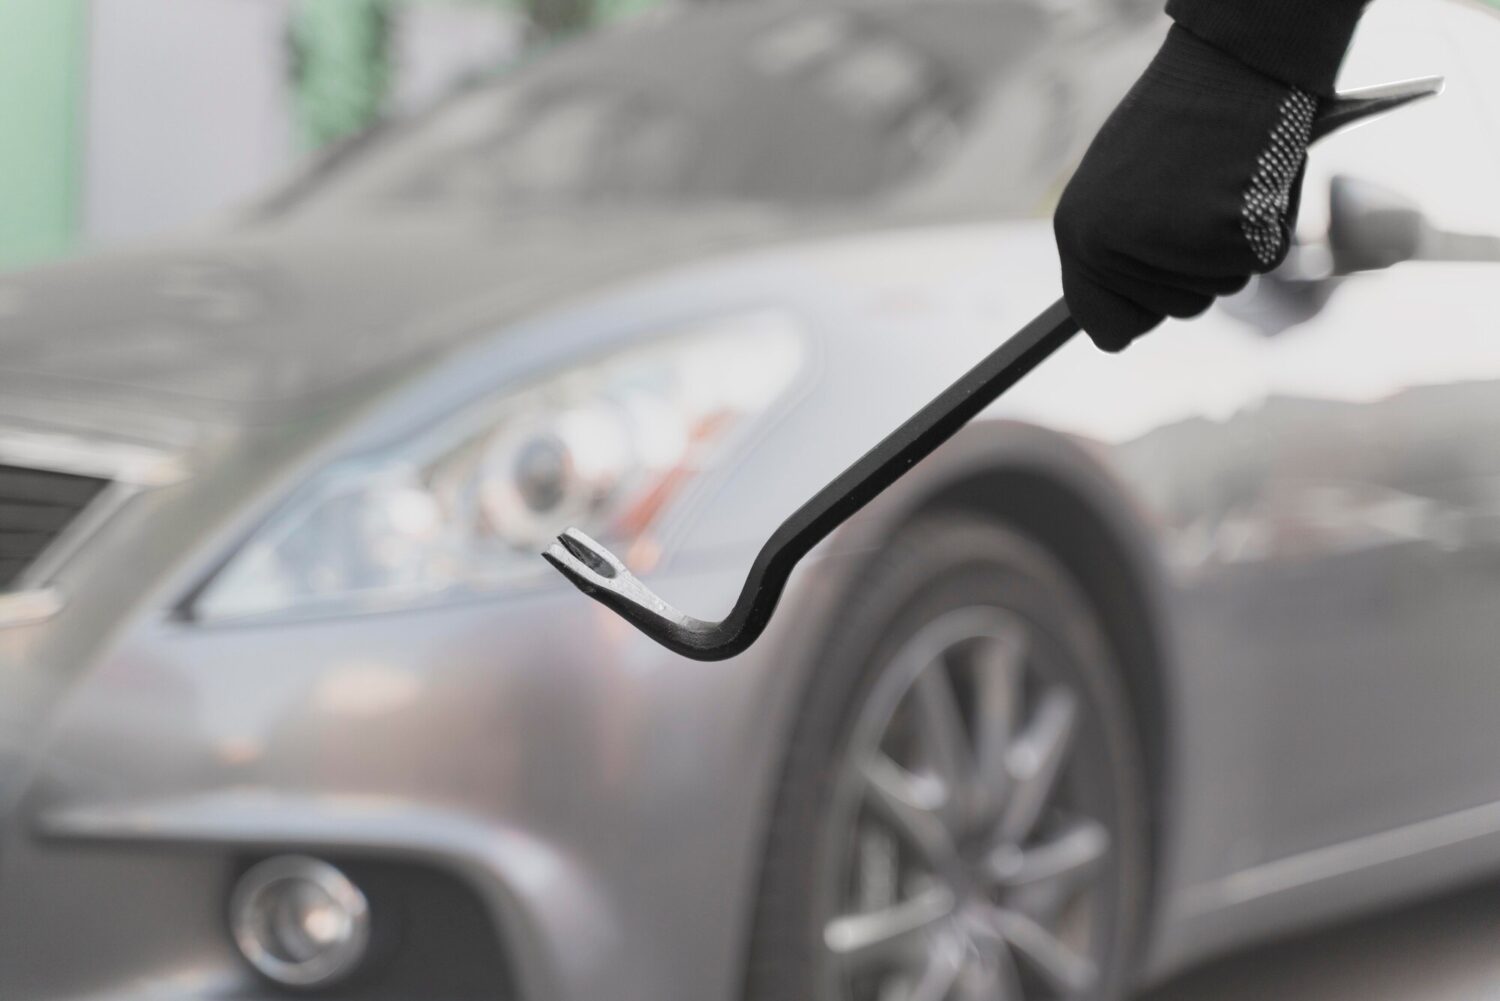
See a fresh dent? You have two clear options: try a kit at home or hire a body shop. Some people decide on price alone, but the real tradeoff is cost, time, and risk. Typical DIY kits run $20-$200. Shop repairs range from $150-$1,500+ based on dent size, paint condition, and panel type. A small DIY job might take 30 minutes. A tougher one can take most of a Saturday. Shops often finish small dents in a few hours to a day, bigger work in up to 2 days. Risk is the divider. DIY can save money, but you might create high spots, crack paint, or fight stretched metal. A solid shop brings proper lighting, leverage tools, and a warranty to limit surprises. Some folks are chosing between DIY dent repair and hiring a body shop right now. This guide will make that choice easier.
Start smart with three quick checks that we will cover throughout: a magnet test to confirm steel or aluminum, light reflection to read highs and lows, and access checks to see if tools can reach behind the dent. These tests guide the next step. They tell you if suction might work, if glue pulling is a fit, or if pushing from the back is possible. Follow along and you will learn the magnet test, light reflection setup, and access checks in detail so you can size dents correctly and pick the right path.
Dent size guide

Start by sizing the dent. Coin-sized is up to 1 inch in diameter with a shallow dip of ≤1 mm. Golf-ball dents measure about 1.6 to 1.75 inches and are often 1 to 3 mm deep. Baseball dents sit in the 2.75 to 3 inch range and are usually deeper than 3 mm. Larger dents can span multiple zones and pull on seams and braces.
Panel type changes difficulty. Hoods are thinner and easier to push if you can reach the backside. Doors are mid-weight and often have bracing near handles and body lines. Quarter panels are thicker, have double-wall sections, and resist movement.
Depth points to risk. At ≤1 mm, many dents respond to glue pulling. At 1 to 3 mm, expect more metal movement and the need for crown control plus tool access. Beyond 3 mm, metal may be stretched and can oil-can if you overpull.
Use three quick diagnostics throughout this article. First is the magnet test to confirm steel or aluminum so you pick the right method. Next is light reflection to map highs and lows, not just the center pit. Last is checking access points to see if a rod or spoon can reach the backside without major tear-down.
Case example: a 1.7 inch door ding on steel, about 2 mm deep, paint intact. The magnet stuck, confirming steel. With a line board, a soft crown appeared above the impact, which explained the wavy look at certain angles. We removed a door plug, found clean rod access, and planned light glue pulls with a small tab plus gentle pushes from behind. Respecting the depth and crown let the panel settle cleanly without paint damage. If that same hit were on a quarter panel with double-wall bracing, the tougher access and higher risk would favor a pro using PDR.
Quick checks before you start
Before you choose DIY or a shop, run three fast checks: magnet, light, and access. They take minutes and prevent guesswork. Start with a clean spot by the dent and place a small magnet there. If it sticks, the panel is steel. If it slides off, it is likely aluminum, which rebounds more and is tougher for home tools.
Now set your light so you can read the surface. Use a single LED bar or sunlight at a shallow angle of about 10-20 degrees to the panel. Move your head side to side and watch the reflected lines bend. That reveals lows, highs, and soft crowns. Last, find an access path. Look for grommets, drain holes, or trim openings so a tool can reach the backside. If a double-wall brace sits over the dent, pulling may be your only option. These checks help you decide if a tiny door ding is a quick DIY pull or a push job for a PDR technician.
- Magnet test: light magnet contact confirms steel; no attraction often means aluminum.
- Light angle: aim LED or fluorescent at 10-20 degrees, stand 3-5 feet back, move your head, not the light.
- Curvature: flat to mild radius panels around 500-1,000 mm are easier; tight curves under 300 mm resist repair.
- Paint scan: look for hairline cracks or chips. If you see them, skip pulling and consider a shop.
- Access points: grommets, wiring boots, inner fender liners, or trunk openings. Plan a straight tool path.
- Bracing check: tap and listen. A hollow sound means open panel; a dull thud often means a brace under the dent.
- Sensor zone: if near a parking sensor or camera, proceed with extra caution.
How to choose dent repair
Here is how to choose dent repair after the magnet test, light reflection, and access check. Think of a simple 2×2 risk matrix in words. Box 1: low difficulty and low consequence. A shallow, coin-size ding on steel with clean access and intact paint. DIY is reasonable. Box 2: low difficulty but high consequence. Simple shape but near a panel edge, sensor, or thin paint. Pick a shop because one slip gets expensive. Box 3: high difficulty but low consequence. Deeper dent on an older car you can practice on. DIY if you accept small flaws. Box 4: high difficulty and high consequence. Sharp crease on a body line, aluminum with double-wall bracing, or stretched metal that oil-cans. That calls for a pro.
Match your diagnostics to four go or no-go cues. If the magnet does not grab, it is likely aluminum. That metal work-hardens fast and springs back, which moves risk up a box. If your light shows a crown or multiple lows, you will need push-pull blending, not a single pull. If you cannot reach the back side through a factory hole, you are limited to glue pulling, which needs patience and a good knockdown. Finally, paint. Any crack, chip, or edge within 1/2 inch raises the chance of flake-off. DIY becomes a gamble. A shop can manage heat and crown control better.
Here is a quick comparison to speed the call and align with how to choose dent repair:
| Factor | DIY | Professional |
|---|---|---|
| Cost | Low kit cost, variable outcome | Higher cost, consistent finish |
| Time | Learning curve, multiple sessions | Booked time, 30 minutes to 2 hours for small dents |
| Tools | Suction/glue basics, limited leverage | PDR rods, line boards, knockdowns, crown tools |
| Paint risk | Higher near edges or thin paint | Lower with controlled pushes, heat, blending |
| Aluminum panels | Harder due to springback and work-hardening | Handled with specialty tips and heat control |
| Warranty | No warranty, you own the result | Written guarantee from a shop |
Fast rule of thumb: steel panel, coin-size to golf-ball, shallow, clean access, and perfect paint can be DIY. Add depth, a sharp crease, or aluminum, and you shift to a pro. If resale matters, shop work protects factory paint value. If you are learning and okay with small highs and lows, DIY can work. Keep the light low, make small moves, and stop if the panel starts to oil-can.
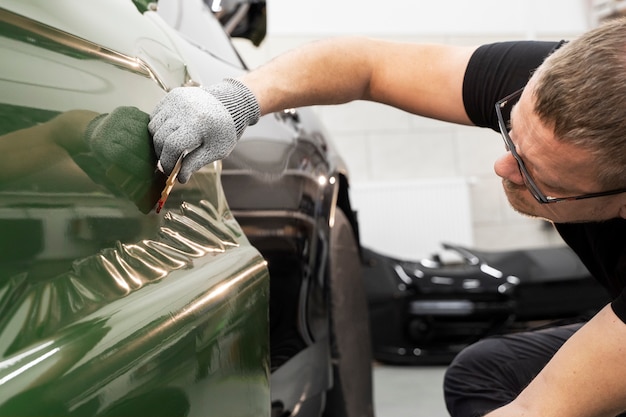
Dent pulling at home
Dent pulling at home can work if you match the tool to the dent. I’ve repaired thousands of panels and tested most consumer kits. Suction cups, hot glue pullers, bridge pullers, slide hammers, and the hair dryer plus compressed air trick all have limits. Some can fix a small, shallow ding. Others only make a dent look shinier and harder to correct. Consumer glue tabs often produce about 20-70 lbs of pull force, which is enough for minor lows. Suction cups help on broad, shallow dents on flatter steel, but they struggle on tight curves or sharp centers.
Kits vary by price and contents. A basic suction cup kit is cheapest and may include one or two cup sizes. Glue puller kits usually have a mini glue gun, sticks, tabs, alcohol, and a knockdown tool. A bridge puller adds a crossbar to spread the load for more even pulling. Slide hammers attach to tabs and deliver a quick impulse that can free a stubborn low. Used carelessly, they can create high spots. The hair dryer plus compressed air trick rarely works on modern urethane finishes, which flex more than old lacquer.
Heed a few cautions. Stretched metal will oil-can even after many pulls. You can also crack stressed paint. Most glue performs best at 120-160°F on the tab and panel surface. Too cold and tabs pop early. Too hot and the glue smears and loses grip. Use alcohol to release tabs instead of twisting hard. Avoid aggressive pulling or twisting near edges and body lines, where clear coat is easier to chip.
Example: a DIYer used a bridge puller on a golf-ball dent about 2 mm deep. Paint was intact but the center was tight. They overpulled the middle, knocked it down, then pulled again. The panel ended up with a high and a soft crown. I re-read it with a line board, relieved the crown, then used smaller tabs at center. About ten light pulls later, it was clean. The takeaway: pick the right tool, make small controlled pulls, and stop if the metal starts to push back.
Glue pulling basics
Follow this sequence for a safe pass. Clean with isopropyl alcohol. Warm the area slightly with a heat gun or hair dryer to room-plus. Load the mini glue gun and aim for 120-160°F glue temperature. Match tab size to the dent’s center diameter. For coin-size dents, start with a 12-15 mm tab. For golf-ball dents, 20-25 mm. For larger lows, try 30 mm and plan on multiple pulls.
Lay a nickel-thick bead, press the tab flat, and let it set 20-40 seconds. Use a bridge or lifter for a controlled pull. Watch the light reflection. If the center rises level with the edges, stop and tap down highs with a plastic or rubber-tipped hammer. Release with alcohol, not dry prying. Step down to smaller tabs for the last 10 percent. Keep heat light. You want glue performance, not panel expansion.
When to stop
Know the stop signs. First, overpull: a small high in the center means you went too far. Second, oil-canning: the panel pops in and out with a hollow sound. That points to stretch and crown control work. Third, any cracked or lifting paint near an edge or body line. Pulling will only worsen that.
Call a pro if the dent sits on a sharp body line, is deeper than 3 mm with a tight center, or the panel is aluminum and feels springy. If tabs keep failing to stick, you likely have contamination, wrong temperature, or a hidden crease. Pause rather than create highs that might require repainting. DIY is best for shallow, round dings on accessible steel panels. For tougher shapes or risky areas, a professional PDR tech is the safer bet.
Repair dent without paint
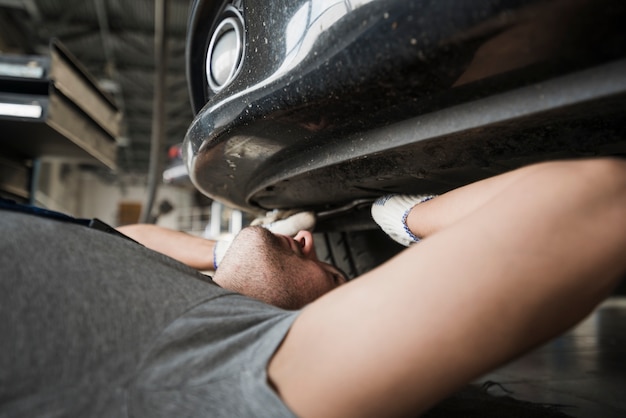
Paintless Dent Repair (PDR) is a clean way to repair dent without paint. The goal is to move metal back to its original contour using controlled pressure. Techs rely on metal memory. If the dent is shallow and the paint is intact, a tech can push from behind with PDR rods or pull from the front with glue tabs. Blending tools then level tiny highs so reflections flow evenly. Pushing offers finer control. Pulling helps when access is blocked or the panel has double-wall bracing.
Typical times: 30–120 minutes for small dents. Typical costs: $100–$250 for the first dent, $50–$150 for each additional. Hail repair often runs $75–$400 per panel depending on density and difficulty. Is PDR worth it? If the paint is good, yes. You keep factory finish, skip filler, and protect resale value.
There are limits. Cracked or chipped paint will still show after metal is moved. Access can stop the job. Some doors hide intrusion beams and heavy bracing, so the plan shifts to controlled glue pulls and extra blending. Sharp structural creases resist correction. A crease with a razor-like center often leaves a faint witness line. Aluminum can be repaired, but it springs back more and work-hardens. That means more heat and patience during push and blend.
Reading light is key. Place a line board at a shallow angle and watch how the lines bend. Work until the pattern runs true. If a dent oil-cans or a crown refuses to relax, the panel is likely stretched. At that point, conventional bodywork is smarter. PDR excels on small to medium dents, soft creases, and hail. It is quick, preserves the original paint, and should be the first option before sanding or spraying.
Case study door ding
Picture a common case: a 1-inch door ding on a steel front door with intact paint. The driver noticed it under bright station lights. First check is the magnet test. A small rare-earth magnet sticks firmly, so the panel is steel.
Next, set a low-angle light. The reflection shows a soft crown around the center. No sharp crease. Depth looks under 1 mm. I remove the interior grommet and use a pen light. There is clear access past the crash beam for a push tool, but glue pulling is faster since the paint is good.
DIY path: with a $40 glue puller kit, a medium tab, and alcohol release, many people can reach 80 to 90 percent in about 45 minutes. Work slowly and keep glue temps in range. Make a few controlled pulls. Tap down small highs. Stop once the panel reads flat in the light. Risk is low, but overpull can leave a tiny high spot.
Pro PDR path: a tech will mix light glue pulls with a few controlled pushes through the grommet, then blend the crown. That usually finishes clean in about 30 minutes. Typical cost is about $150 in many markets. A first-time DIY attempt succeeds on this type of ding about 7 out of 10 times. A pro result lands near 95 percent or better because the last trace of crown and texture gets corrected. If you want the best finish, hire PDR. If budget leads and you are handy, DIY is a solid option.
Body shop estimate dents
Here is how a shop builds a quote for body shop estimate dents. We start with labor hours by damage type and panel. Small dings or light blends may take 1.0-2.5 hours. Deeper creases or body line hits can run 3.0-6.0 hours. Local labor rates often range from $60-$150 per hour. Materials show on a separate line: sanding discs, masking, primer, base, clear, tack cloths. Expect a materials fee of $40-$80 per repair.
If the panel needs paint, we read your paint code on the VIN tag or jamb sticker to mix the right shade and variant. Pearls and tri-coats take extra time to match compared with solid colors, so labor can rise slightly.
Next is R&I (remove and install). That covers door handles, moldings, lamps, sensors, inner liners, and sometimes glass. It keeps edges clean and prevents tape lines. A simple door handle might be 0.3-0.6 hours. A bumper with parking sensors can add 0.8-1.2 hours after calibrations and wiring checks. If we blend an adjacent panel to hide the color transition, we add blend time to that neighbor. Typical blend adds 0.5-1.5 hours per adjacent panel. Hood, door, quarter, and other panels rate differently due to curves, bracing, and access.
Short story from last month: a car arrived with a quarter panel crease behind the rear wheel. The paint had cracked and the metal was stretched, so PDR was not an option. We straightened the crease, applied a thin layer of filler to level lows, primed, then sprayed basecoat and clear on the quarter. To make the color seamless, we blended into the rear door by 0.8 hours and into the bumper cover by 0.6 hours. Materials stayed in the $40-$80 range. Most labor came from the crease repair and R&I for the tail lamp and wheel arch trim. The finish matched clean and the panel read straight under shop lights.
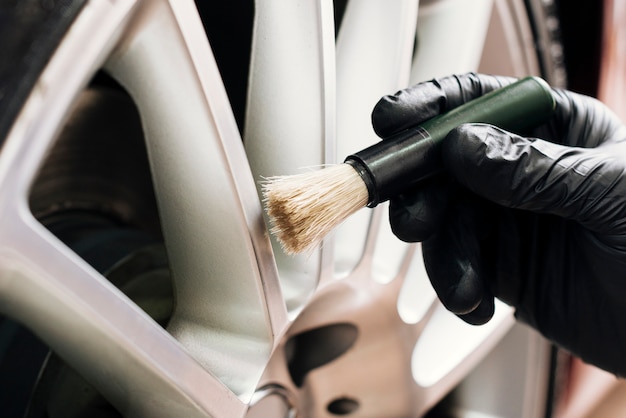
DIY toolkit vs pro PDR
I get asked all the time: diy dent or shop? The honest answer sits in the tools and how they are used. DIY kits work on shallow, round dings with intact paint. Pro PDR setups handle tricky shapes, crowns, and tight access. Pros also cross-check panels with line boards from two angles and manage crowns before and after each pull. That control is the difference between a smooth panel and one that oil-cans every time you close the door.
| Tool | DIY price | Pro price | Use case | Risk level |
|---|---|---|---|---|
| Suction cups | $20-$50 | $150-$300 industrial | Large shallow dents on steel panels | Low, may create high spots |
| Glue gun & tabs | $30-$120 | $400-$900 commercial guns & pro tabs | Small to medium pulls with intact paint | Medium, overpull and paint lift risk |
| Knockdown hammers & tips | $15-$60 | $150-$400 with varied tips | Leveling highs and tuning crowns | Medium, can mar clear coat |
| Slide hammer | $25-$80 | $200-$450 adjustable | Stuck or deeper pulls via glue tabs | Higher, can stretch metal |
| LED line boards | $40-$150 basic | $300-$1,000 dimmable, battery | Reading lows, highs, and texture | Low, learning curve in reading lines |
| PDR rods & whale tails | $80-$200 starter set | $1,000-$3,000+ full kit | Precision pushing from behind | High in untrained hands |
| Heat guns | $20-$60 | $100-$250 variable control | Soften clear, reduce cracking risk | Medium, scorch risk if held close |
Here is a key tip from years on the tools. The board and the knockdown matter as much as the pull. Pros read the lines, then cross-check with a second reflection board to catch hidden highs.
We also control crowns first. That means gently relaxing the raised metal around a dent before any serious pull so the panel moves as a system, not a fight.
With DIY gear you can still succeed. Work smaller. Start with larger glue tabs. Chase highs with a soft-tip knockdown. If the panel starts to oil-can or the paint feels tight and dry, stop. That is your signal the metal is near its limit. At that point a PDR rod with precise leverage can save you money compared to sanding, filler, and paint.
Pitfalls and panel damage
DIY dent work can go wrong fast. Paint often cracks or lifts at the edge of a dent, especially around sharp crowns. OEM paint film is typically 90-140 microns thick. It does not like to stretch.
If the hit stretched the metal, the panel can start oil-canning. It will pop in and out like a soda can lid. Aluminum is trickier. It work-hardens quickly and springs back roughly 10-20 percent more than steel. Your pull may stall, then jump high. That creates highs from overpull, followed by knockdowns that scuff clear coat.
Body lines and inner braces raise the difficulty. A dent through a styling line can shift the line a few millimeters. Your eye spots that right away. Pull the center too hard and the line turns wavy. Hidden bracing in doors, hoods, and quarter panels can block tools and send force where you did not expect. Many people pull the center clean, then the outer edge rises while the inner edge stays low. Under a line board, the panel looks like a funhouse mirror. On aluminum, a few heavy pulls can create tiny micro-fractures in older paint that only appear on a hot day.
Shop example: a driver used a consumer slide hammer on a golf-ball dent near a door’s rear edge. The glue held. The center came up fast and overshot by about 1 mm. Edge paint lifted in a 12 mm crescent. Under light, we found a soft crown never addressed and a brace behind the pull zone. We heat-cycled, knocked down the high, re-leveled the crown, and had to refinish because the clear had already failed. That dent was a good candidate for a clean PDR push-pull. The overpull and paint lift turned it into a small body and paint job.
Insurance and value
Here’s a simple way to think about insurance for dents. If your deductible is $250–$1,000 and your repair will cost less than that, do not file a claim. Small door dings and many PDR fixes often fall under a common $500–$750 deductible.
Claims can raise premiums for 1–3 years if it is not a comprehensive hail event. A deeper crease that needs filler and paint, or hail damage on several panels, can make a claim worthwhile. Factor in diminished value. Keeping factory paint intact helps resale more than most people expect.
“Preserve factory paint whenever you can. It’s the cleanest path to value.”
Use these quick tips. Compare the estimate to your deductible. Think about possible premium changes. Weigh resale value on newer cars and lease vehicles. Lease inspectors are strict about body lines and paint texture. Read the wear guide and take photos before turn-in.
Use this lease return check list:
- Measure dent size and depth. Over 1 inch wide or any sharp edge is usually a chargeback.
- Look for paint breaks or chips at the edges. Cracked paint gets flagged right away.
- Check body lines and panel gaps. Any ripple or misalignment near seams can cost you.
- Confirm sensors and cameras near the dent still work. Warning lights are a red flag.
- Document everything with date-stamped photos in bright, even light.
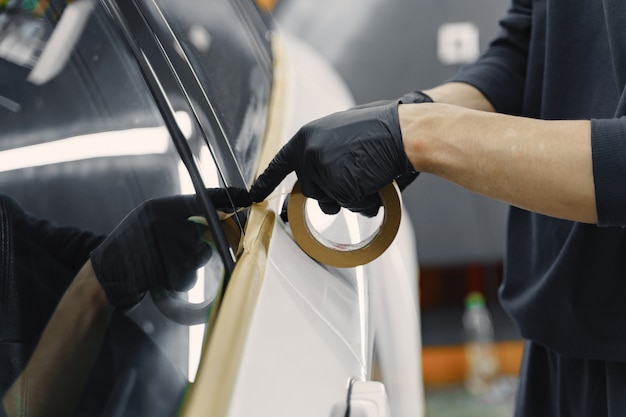
Access points and trim
Plan how you will reach the backside of the dent before any pushing or pulling. Start with door wiring boots. Pop the rubber boot at the hinge side to check for openings in the inner skin. Drain holes along the bottom of doors and quarter panels can fit slim tools. Protect paint edges with tape.
Inner fender liners come out quickly and open a path to the back of a fender or quarter. Expect plastic clips and 7-10 mm screws. On reassembly, small interior screws typically need 5-9 N·m so threads do not strip. Under the hood, look for bracing cutouts under the outer skin. If a brace sits over the dent, use a long hook rod, or switch to glue pulling.
Watch for yellow or orange connectors and looms with bright tape. That is airbag wiring. Do not poke near it. If you must remove trim nearby, disconnect the battery and wait a few minutes before unplugging anything. Treat SRS with care, then proceed.
Mini case: a hatchback liftgate with a two inch soft dent near the lower right corner. I removed the interior trim with a plastic pry tool and released the latch rod clip. A brace blocked a straight shot.
I used the factory wiring grommet hole for access, added a rubber grommet guard to prevent chafing, and inserted a medium PDR rod at a shallow angle. With a line board outside, I pushed from the low and tapped down a light crown. Reinstalled the panel with all clips seated and screws snug at about 6 N·m. No rattles. No broken tabs.
Light reflection setup
Reading dents starts with controlled light and careful eye movement. Fluorescent tubes give a soft fog that is easier for beginners. LED boards create crisp lines that expose tiny highs and lows.
Use line boards for straight stripes that bend around damage. Use fog boards for a smooth gradient that shows shape changes with less visual noise.
Place the light low to the panel at a 10-20 degree angle. Set the distance to 3-5 feet. Slide the light left or right until the lines or fog sweep evenly across the dent.
Move your head, not the lamp. Small head shifts change the reflection and reveal where metal is low or high. On flat doors, aim the stripes perpendicular to the longest part of the dent. On curved hoods, match the curve and increase distance to keep the read clean.
Watch for crowns. Lines will bulge and widen just outside the low, like a ripple before a splash. Example: on a silver Camry, a shallow door ding showed a soft dip, but the crown appeared as a gentle ballooning of two lines about 1 inch around the center. Tapping the crown first relaxed the area. The low then came back with minimal pulling.
Is PDR worth it
People ask me this a lot: is PDR worth it? For clean, small dents, yes.
Think of value like a simple balance sheet. A small door ding fixed with paintless dent repair can preserve $200–$400 in resale value, save 60–90 minutes of your day, and protect factory paint. Risk stays low if the paint is intact and the metal is not stretched. In shop data, success rates sit around 85–95 percent for a 1 inch ding on steel with good access. You keep the original finish and avoid filler and repaint.
A medium crease is trickier but still viable. Picture a 3–4 inch shallow crease on a door or fender with no paint break. Good PDR can retain $300–$600 in value and save you about a day versus paint work. Tool time usually lands in the 90–150 minute window. Risk climbs because creases carry tension and crowns. If access is fair and the panel is steel, odds are around 60–75 percent. Aluminum drops that to roughly 50–65 percent due to springback. If the crease is sharp, sits on a body line, or shows micro cracking under light, consider a hybrid plan or a body shop refinish to avoid high spots and oil canning.
Hail panels are where PDR shines. Roofs, hoods, and trunks peppered with small dents can see $500–$800 in resale value preserved on late model cars, and you skip multiple paint cycles. A skilled tech can clear a typical hail panel in 60–180 minutes, sometimes faster with proper access and lighting. Risk comes from volume and panel material more than individual dent size. With intact paint, a quality hail PDR job has a success probability around 80–95 percent per panel.
Verdict: PDR is worth it when paint is sound, access is decent, and the dent is small to moderate. If paint is compromised or the metal is stretched, choose a body shop plan.
When to pick a shop
If you see paint damage, stop. Chips, cracks, or lifted clear mean the finish has fractured. DIY pulling can spread the break and expose bare metal.
Sharp creases on a body line longer than 3 inches are a hard stop too. These need controlled pushing and crown control. Otherwise you trade one clean crease for a field of highs and lows.
Use these four clear thresholds before you try home tools:
- Any visible paint issue, even hairline cracks or spidering, goes to a pro.
- Creases or body-line hits longer than 3 inches, especially if you feel a knife-edge ridge with a fingertip.
- Aluminum panels with double-wall bracing, like many hoods and liftgates. Aluminum springs back about 10-20 percent more than steel and work-hardens fast.
- Dents near sensors, wiring, or airbags. Think quarter panels with blind-spot modules or doors near side-impact bags.
If the panel pops in and out or oil-cans, the metal is stretched. Every pull risks making a potato chip out of the panel.
If you checked one or more of these boxes, get a professional estimate. Next, we will steer you toward the smartest repair path.
Rancho Cordova body shop
If your checks point to hiring a pro, MPB Auto Repair is a solid choice for drivers near Rancho Cordova. We repair dents and full collision damage with the goal of preserving factory paint whenever possible.
Recent result: an aluminum hood with a golf-ball dent and a light crease near a body line. Paint was intact. Access was tight. The panel showed slight springback. We mapped it with a line board, used soft glue pulls to lift the lows, then finished with controlled rod pushes through a rear brace opening. The finish stayed OEM. Sensors were untouched. Reflections read clean.
If you want a straight estimate and a quick visual, stop by. We will show you the light setup, discuss access, and tell you if PDR will work or if refinish is smarter. No pressure. Just clear auto body repair advice.